Thursday, August 30, 2012

Monday, August 27, 2012

ALIGN Trex 450, Modified

'Modified' mean's this helicopter had so many 'third party' upgrades there is hardly any parts left that are made by ALIGN themselves. This heli had so many upgrades I can't call this bird an ALIGN?
 
Trex 450 and it's LED Navigation Lights


ALIGN Trex 450 and for the Hi-Res (large) picture, click 


ALIGN Trex 100

ALIGN Trex 100


Thursday, August 16, 2012

Psychedelia TRex 450

This result was after playing with Color Efex Pro
a NIK Software Plug-in for Paintshop Pro X4


HPI Baja 5B SS

My 1/5th scale Baja 5B RWD buggy - Work in Progress


HPI Baja 5B SS Manufactures Home Page


In the Bag ...

Sony CyberShot DSC-H9
  
My first digital camera was the FUJIFILM FinePix 2800 Zoom. The Sony Cybershot DSC-H9 (review) was the second digital and my last Point & Shoot camera.

Sony CyberShot DSC-H9
Sony Cybershot DSC-H9
  

Nikon D90
... My wedding to Nikon and the D90 ~ review
.   
Nikon D90, the first DSLR into the BIG Bag of Wonder Toys

Nikon AF-S Nikkor 16-85mm 1:3.5 - 5.6G ED Zoom


Nikon AF-S Nikkor 16-85mm 1:3.5 - 5.6G ED Zoom.
Sing along "Just an all purpose ZOOM" ...


HOYA  PL-CIR 67mm - Circular Polarizer


Into the creative mix came the ever popular Circular Polarizer, the HOYA  PL-CIR 67mm.


Eye-Fi Pro X2


Eye-Fi Pro X2 - Always in my D90 is this little gem, the WiFi enabled SD card. It is sure is convenient not having to do the typical (wired) camera to PC image file transfer.


Lexar Professional, 16GB SDHC Class 10
 

Lexar Professional, 16GB SDHC Class 10. The fastest SD Card in the bag but no WiFi. Used when frames per second, speed is the priority such as the case in action photography.


...

Flood-lights (2 x 160 LED)


I do allot of what could be called 'product' photography and having a good lighting setup is a must. With better lighting in mind and not wising to use my camera's built-in flash I have a couple of small and inexpensive LED Flood-lights, 2 x 160 LEDs.


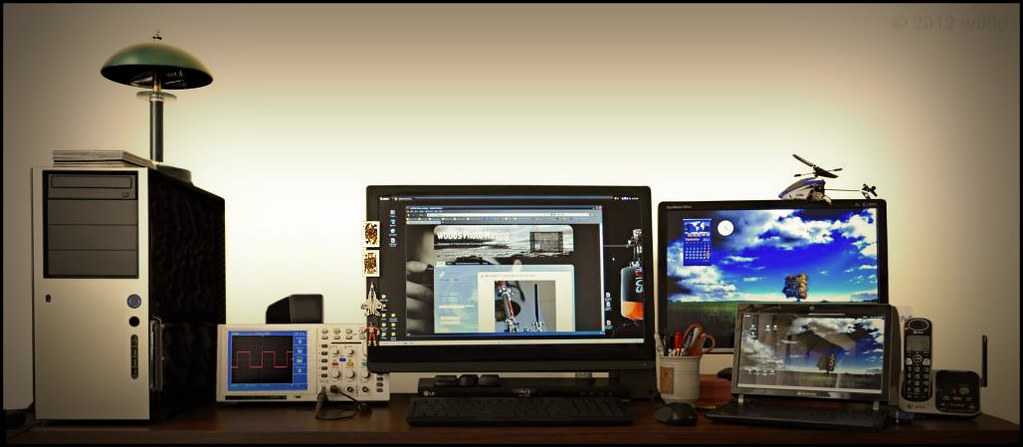
w00d's Play Station
... The Computer and Photo-editing ...


"Toaster" desk, work station ~ © 2014 w00d, pwoodyp

.
PaintShop Pro X4 Ultimate
An important if not the most important tool for any photographer is a good photo-editor and of course the knowledge and skill to use them effectively. The primary editor I use is PaintShop Pro X4 Ultimate where 'Ultimate' is both the KPT Collection and Color EFX Pro 3 plugins. 

Although I tend to agree Paintshop Pro is not quite (not even close) the equivalent of Adobe Photoshop CS6 (review and free trial download link) nor Adobe's newest "rental" version, Photoshop CC and it's certainly the resource hog the reviewers claim. However if the budget is the concern then Paintshop Pro might be a good candidate for anyone just starting out. Alternately for one of the many free options available see my list of FREE photo software on my Photography Tutorials page.

Complimenting my copy of PaintShop I've added Photoshop CS2 and Photoshop Elements 11 to my arsenal of photo-editors. Also after trying their 30-day free trial I will buying a license for a special purpose application called Helicon Focus. This software will give my MACRO workflow the post-processing power that according to Helicon "enables one to extend the depth-of-field beyond what is available within one shot". 

Sure some day I'll pony up the cash for Photoshop CS6 or CC but until then the photo-editors listed here will do what I need or as they say "this is as good as it gets" ... for now!
            

Prime Time for a Prime 
... Added the NEW AF-S Nikkor 105mm 1:2.8 G ED MICRO (MACRO) Lens ~ samples
New MACRO Prime ~  AF-S Micro (Macro) Nikkor 105mm 1:2.8 G ED lens


WACOM Intuos5 Touch Small ... New Pen Tablet

WACOM Intuos5 Touch Small
Touch Small


Used Olympus OM-10 w/ Manual Adapter

New: Used Olympus OM-10 w/ Manual Adapter


Wednesday, August 15, 2012

Evolution of a FINE Photograph


Between what came out of the camera, what was worked on in the Photo-editor and to the final product is truly amazing in this mind's eye, a beginner. Yes "they" have said "Photoshop" is for the weak and we should be able to do it ALL within the camera. Although in my opinion I see comments like that which is often voiced by people who call themselves professionals as shortsighted and at worst condescending. Comments as such do nothing for the beginner and his or her confidence except to make them feel inadequate about their skill with the camera. Like the camera is only a tool and not a means to an end. Then so is post editing a tool to affect an outcome in an artists minds eye.


Tuesday, August 14, 2012

Scale Helicopter, the Bell UH-1 Huey

HeliArtist - BELL UH1 Huey
 

Ready for the first TEST Flight but unfortunately this test didn't go to plan. I found the bird needed a 3-Axis GYRO for stabilization. Current status: A work in progress until the electronic stabilization is purchased. An alternate option would be to install the Trex 450 Main Rotor with it's Fly-bar stabilization. 


Tail Riser Assembly
: Plastic Idler pulleys needed replacing with a metal (CNC) pulley. Plastic pulleys as supplied are known to wear tail drive belts prematurely therefor the preemptive pulley replacement as shown in the next image.
 
Tail Riser
: The problematic plastic idler pulleys replaced with steel bearings


  Sullivan Pushrod - Checking the FIT, correct length and operation
    

The  Sullivnan connection
  
LED wiring and testing.
Wiring to be
routed inside the body


Scale Main Rotor Head
   
  
Trex 450 Skeleton for the UH1: Showing the Tail Riser assembly and the Scale Main Rotor Head. Also shown the Spartan QUARK, ICE50 ESC, 3 x Servo placements


Shopping for the UH1, Digital Pitch Gauge, Bubble Level, TRex Pro Tail Grips and Hub, TRex Pro Bell-Crank and Slider,
KDE Direct Series V2 Tail Upgrade


Kit contents but n
ot shown here is the 'Tail Riser' assembly


ALIGN TRex 450sa
plastic Tail Casing will be used. Note, the stock casing came standard with a plastic Drive Pulley which I have replaced with a CNC version shown here


Video: MKS DS95 © MKS
     

Bell UH1 Huey
  

  Update: The Bell UH1 Project is Alive and Kicking Butt


Hyperion EOS Sentry Battery Meter


Hyperion EOS Sentry Battery Meter
QUOTE: "Know your packs!  The EOS SENTRY is a quick, convenient, easy-to-use device. It shows at a glance the remaining capacity in your battery pack, cell balance, and other information you need to get the best performance and reliability from your batteries, and avoid costly mistakes. 

The large LCD display and capacity graphs make it easy on your eyes.  And the low price of the SENTRY compared with the high cost of batteries make it a sure money-saving addition to every toolbox at the flying field, boat races, or car race track.


Discharge of LIPO in particular beyond 80% of capacity is sure to damage them.  Be sure to use the EOS Sentry after flights (or laps) from time to time. If you see 19% or less capacity remaining, reduce the Transmitter timer until at least 20% is shown remaining at the end of each flight or race
"


DIY: Power Supply

I modified the following Power Supply Unit (PSU) to use with a 12vdc RC Battery Charger. If you have an old computer (PC) PSU collecting dust or your thinking of tossing one into the trash then consider this alternative. Rather than spending an arm and a leg for what they want for those specifically made for the 12vdc RC Battery Chargers this modification might be the sweet deal your looking for, it certainly was for myself.

A modified PSU as such would also make a pretty good Electronics Lab or Bench Power Supply. To illustrate, I also use the +5vdc output to power my RC Helicopters RX, Servos and GYRO to effectively bypass powering the motor during it's mechanical setup. This eliminates the risk of the heli accidentally powering up the motor during the setup procedure. Normally we would mechanically or electrically disengage the motor or use a separate battery pack to bypass the ESC when setting up our helicopters. And occasionally I have used this PSU to power many of my smaller electronic projects but these are only a few examples as to possible uses. Not to be condescending but the only limit would be our imagination.

Gotcha: The best PSU for this type of modification would be a high AMP or highest AMP PC power supply we can find. This is because some of the really old ones just don't have enough juice or amperage to power more than one charger if any. Alternately if we don't have a suitable PSU kicking around you might canvas family or friends to see if they have anything worth using. However for reasonable prices a good if not the best source of used equipment therefor high amperage power supplies would be from sites such as eBay or Craigslist. 

WARNING: I was working on a device with the potential to KILL! 
I can't be any more serious as a typical PC Power Supply uses 120vac or 240vac for power input. Please, this article shouldn't be considered complete instructions on how to build or modify a PSU therefor I have been deliberately vague with it's content. Do your homework, research carefully and use your own best judgement before tackling a job of this nature. A little common sense can go along way, first and foremost be sure of your abilities then be sure of your wiring (double, triple check) and don't touch anything you shouldn't while the power is on!
  
    
Recycle, Reduce and Reuse
      
My modified PSU supports 35 AMP per rail w/ connections for +12v (Yellow) +5v (Red) and Ground (Black). Available for my use are three separate +12vdc power rails however as shown in the images I'm only using one +12vdc output along with one +5vdc output. The red LED indicates 'Power-on' with the blue LED to indicate 'Stand-by' power and the Toggle Switch powers the unit on/off.


Built using the following diagram


I didn't add the three fuses shown in the diagram because this PSU is protected with it's own set of fuses from the manufacture. But I would recommend you consider adding the fuses regardless as it's probably good engineering. Put simply the additional fuses adds another level of security and piece of mind

Note: Within the image notice the colours of the wire connections correspond to the colours of the pinouts. Also the 10Ώ 10w Resistor as shown is very important because PC Power Supplies generally don't like operating without a constant load to stabilize their voltage output.
Click image to zoom in


Build one for yourself?

Rather than rewrite the book I would suggest looking to Google (see links) as I did for information and inspiration. Found with a simple search would be enough information along with a number of well written (and not so many) tutorials on how to build your own Bench Power Supply. The only real difficulty is finding a suitable high amperage PC Power Supply for your project. 

In closing if anyone decides to take on a project like the one outlined within this article be sure to come back and share your creation ...


Sunday, August 12, 2012

Saturday, August 11, 2012

Soldering Station

My AOYUE Int2900, Soldering Station, Variable Temperature, 70W - Digital


Wednesday, August 08, 2012

My OLD Twin Lens Reflex (TLR) Camera


Flexaret IIIa 
(1951–1956), Twin Lens Reflex (TLR, WiKi) Camera
Made by Meopta in the former Czechoslovakia

  • Shutter: Prontor-S (B, T, 1–1/300s) synchronized shutter.
  • Viewing Lens: Anastigmat 80mm 1:3.0.
  • Taking Lens: Meopte Mira II F80mm 1: 3.5 to F22

This camera been in my possession for near 30 years but as the dates above show this camera is around 56 years old or as near as I can figure with the dates given. This camera was born about the same time when I was born. While in my possession sitting on a display shelf neglected for the 30 years the poor old thing had stopped working, it's shutter wouldn't operate. 

I would have to look inside in order to diagnose the problem and to see if I could get this little bit of 'history' working. After some research on the NET I was informed in order to get at it's shutter mechanism all I needed to do was to unscrew it's 'Taking' lens. The research also suggested the typical cause of shutter malfunctions in these particular cameras was it's gummed up works due to old age of the lubricant used. So I unscrewed the 'Taking Lens' and after looking at it's shutter mechanism I found it was indeed as the advice suggested. All she really needed was a little cleaning as the old lubricants had solidified thus stopping the shutter from operating smoothly. After cleaning with Isopropyl Alcohol and re-lubing with a light machine oil I was now able to operate the camera leaving the issues to deal with was the dirt on the view screen and lenses (inside and outside) and the cosmetic issues seen on the outside. 

Fantastic now the camera is working like new, would only need to find some FILM (that 'strange stuff' put inside cameras before Digital Cameras), clean the lenses and we would be "off to the races" as they say. 

Now the camera proved itself can work I would really like to get it's exterior looking like it was when new. As we see in the photo it's looking a little beat up after being neglected for so long. However I have no clue on how to proceed or how I'm going to get that job done remains to seen?


Monday, August 06, 2012

ALIGN TRex 450 Colour Change

Teaching myself how to photo-edit without the aid of a tutorial.
... Changing an RC Helicopters canopy colour. Possibly to previsualize a new paint scheme.

Click Images for larger view

ALIGN TRex 450: Original Colour, Mellow Yellow
Original as Photographed (yellow)
  

ALIGN TRex 450: Bloody Red
Changed to Red


ALIGN TRex 450: Blue Gradient ~ Kid is talented, eh
The Blue Gradient
Notice the hue changing from the dark blue at the top of the canopy toward the lighter blue at the bottom


Update: May 22, 2014

WARNING: This is the result of being in a SILLY mood.


ALIGN TRex 450: Grey Gradient
Changed to Grey Gradient

ALIGN TRex 450: Orange ~ Hey, do you really need me to tell you what colour this is?


Changed to Orange