Tuesday, October 23, 2012

The Revolution Continues

Following are a few camera accessories for my Nikon D90 which I bought out of China.

These are low cost alternatives (clones) of the high priced items offered by those who I won't name. Safe to say these company's are well known, BIG, corporate wide and they certainly don't need me to do their advertising for them. If they do they can send some of that advertising dollar my way ...

However as said in the Latin caveat emptor or in plane English 'buyer beware' because we get what we pay for. And being the sneaky 'snake oil' promoters they are, they do make them look great on paper.

Aputure Timer Remote
... This product works as it should therefor I can say I'm happy with this item.
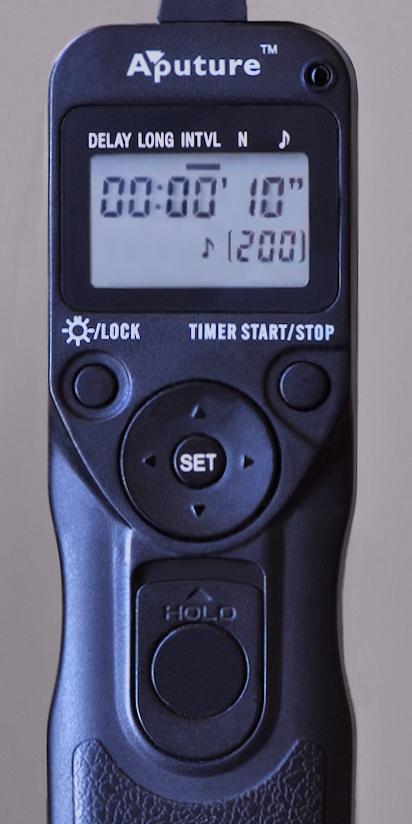

Aputure Timer Remote


Aputure Digital LCD Timer Remote for Nikon D90
   

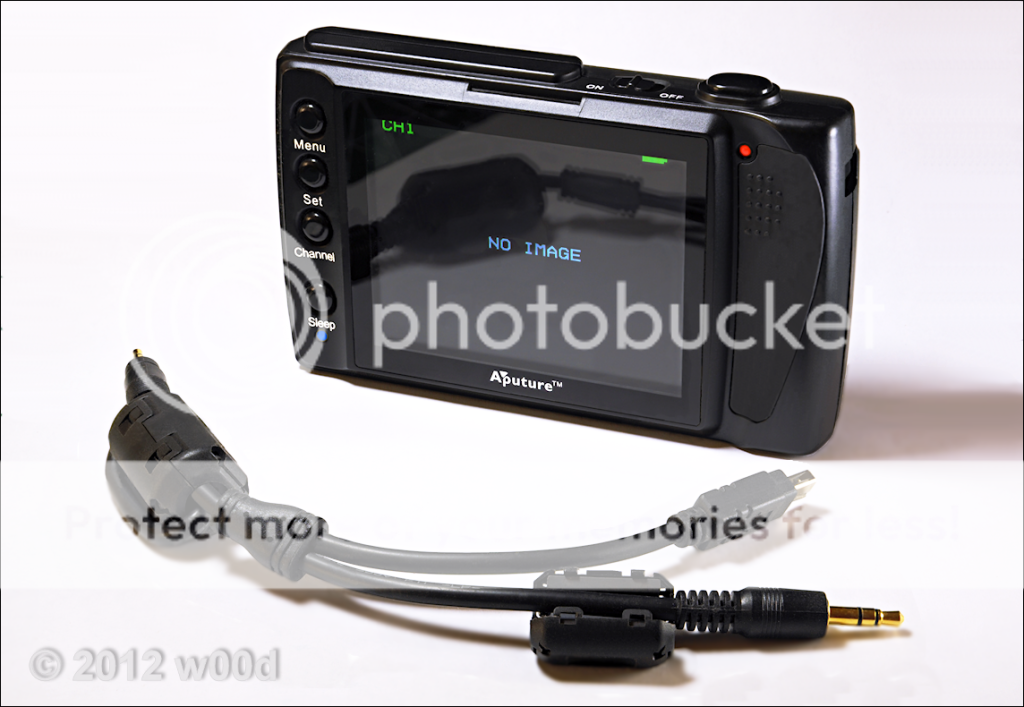
The Aputure Gigtube Wireless Viewfinder
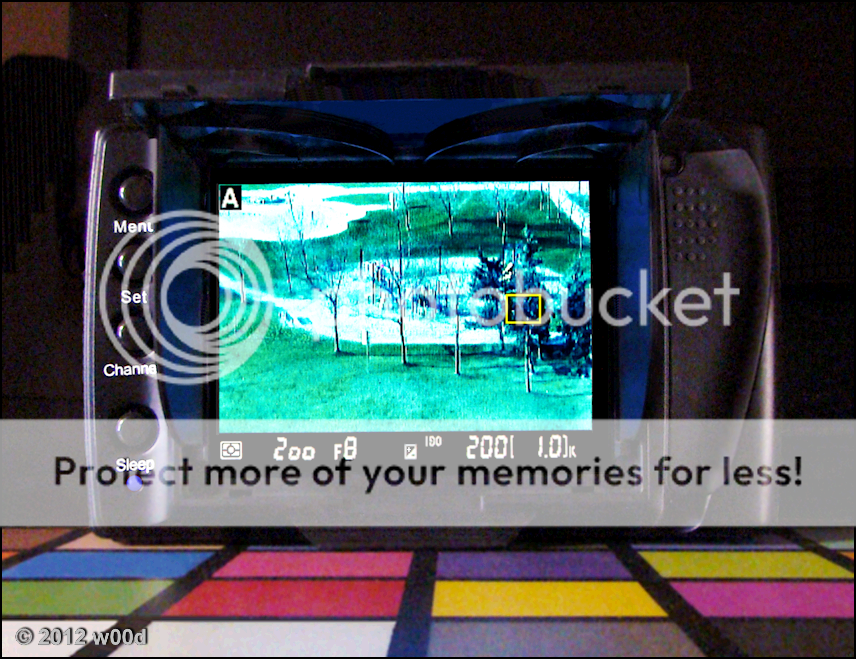
for Nikon D90 displaying the Nikon D90 and it's Info Screen.


Yes the viewfinder also works in Live View however the screen's resolution leaves allot to be desired even though it's tad larger than the D90's high-res display. As for functionality the only camera control on the remote is the Shutter Release.

In all honesty I can't say this particular wireless display is the equal of the on camera display, it's certainly not. With it's sub par screen giving less resolution than desirable the more concerning was it's RF Interference. To help reduce said interference I added another Ferrite Bead which did help reduce the screen noise. Nevertheless the viewfinder is usable out to about 15 feet before the Interference becomes a serious issue and almost unviewable. Close to the camera baring the less than perfect screen resolution it works well but the RF Interference increases in intensity the more distance I put between it's receiver and transmitter.

Now apparently Aputure are offering a new version of this viewfinder which they are calling the Gigtube Wireless II. And for added-value this Gigtube has a small camera built into it's transmitter. In theory at least their newest version should offer a better viewing experience as they have improved upon the viewfinder's screen. But again this info came by way of their marketing material and believing in "that" is what got me into trouble with Aputure's first version ... Ergo caveat emptor, again!

As for this version I feel it's one of those products where 'buyers remorse' would aptly describe my feelings after un-boxing and trying it for the first time. The excitement I felt during the un-boxing quickly dissipated after trying it for the first time.

It's my opinion Aputure went too "cheap" with it's display screen. The viewfinder on whole was usable assuming you don't mind a little RF interference however the image presented was very, VERY disappointing! Being only VGA (?) this viewfinder certainly would have benefited by more resolution, maybe a screen to match the high-res displays found in just about every modern DSLR?

A side note: I did voice my concerns about this 'Viewfinder' on the retailers 'User-Review' page and found they are censoring ALL negative comments for this products and for many other products also. I guess I shouldn't have been surprised but I couldn't and didn't TRUST any of user-reviews found on this particular retailer's site who's name I refuse to mention. In my defense I must say I was being as polite and professional as I could be, more so than here only because I didn't want my comments dismissed due to poor behavior on my part. Regardless my review never saw the light of day, so I'm saying it here ...
    
Receiver and Connections. Notice the open Ferrite Bead which I added thinking it might help cut down the interference. It did help in so much as I got a little more range before the screen became unviewable.
The receiver with the removable SUN Screen currently displaying the D90's Live View but don't judge the device by this image. This image was modified using my photo-editor and I made it look much better than it really was. Yes, you can laugh now!
The Transmitter showing channel 4
of four available channels.


Tuesday, October 09, 2012

Digital Caliper Battery Modification

The inspiration for this modification came from Digital Caliper Battery Hack by Robert C at Sparkfun Electronics. My motivation for doing the mod follows came from Caliper (WiKi) who showed me a very convincing reason why my particular caliper was prematurely draining it's battery. 

QUOTE: Many Chinese-made digital calipers are inexpensive and perform reasonably well. One point worth noting is battery current when they are turned off. Many calipers do not stop drawing power when the switch is in the off position; they shut down the display but continue drawing nearly as much current. The current may be as much as 20 microamperes, which is much higher than many brands. Caliper (WiKi). 

Given the issues outlined above with many Chinese-made digital calipers, I also went with this modification because I'm certainly cheap and hate the whole concept of throw-away-one-use batteries as the technological improvements of rechargeable batteries has come far I just don't see any reason or need for throw-away batteries as we move forward into the future

The battery I used certainly has more capacity but more importantly I used a battery that was rechargeable but also had a very low self-discharge (WiKi) rate. This assured I will never need to buy any more batteries at least for a very long time to come. Also, it is important any rechargeable battery you consider must have a very low self-discharge rate. See my page, LSD-NiMH Rechargeable Batteries or Google "Low self-discharge rechargeable NiMh batteries" for more information and some choices as to specific brands.  

The modification I implemented didn't take too long to complete and would be relatively easy to repeat for anyone who has some basic electronics or would know his or her "positive" from "negative" and their soldering skill would also be assumed. I would bet given the following photos would be all one needs in order to complete their modification. However, if more information is required I have provided additional linkages throughout this post.

FYI: It's been suggested this modification was somewhat "overkill" and realistically I would tend to agree. Therefore as it was also suggested at Sparkfun I pass on an alternative option that is simpler and it certainly requires NO electrical and/or soldering skill but will indeed assure long or longer battery life. Simply remove the calipers button type battery when not in use or in storage.

The modification:  

Route the cable andconnection


Solder the cable and connection


Solder another cable and connector to a battery
Low Self Discharge (LSD)
Double-A (AA) -
1.2v - 800mAh - NiMH - SONY CycleEnergy Rechargeable Battery


Fuzzy Battery. To  attach the battery to the backside of the Caliper I used Velcro
You've heard of Fuzzy Dice well I have me a Fuzzy Battery.
To aid a quick removal I attach the battery to the
Calipers back-side with Velcro.


Before use re-set the Caliper
Do'h, before using or photographing (I didn't) best not forget to reset your Caliper to ZERO!


Caliper Storage Case and Battery storage ...


After disconnecting, the battery stores away quite nice and neat in the storage case

FIN

  
Additional Information:


    Tuesday, October 02, 2012

    A Signature Image

    My inspiration came out of the fact the username I generally use most often is w00d which as it happens is also DOOM but backwards and upside down. Therefor I have always enjoyed modifying the Box ART of this very old and popular game, DOOM³ © ID Software a first person shooter. I have on occasion also used the image as a 'signature' image but the image just make's me giggle. 

    For a little more drama I choose to animate my Box ART modification. The animation was created using a very old version of JASC Software's, Animation Shop 3. Which is to say in a somewhat less loftier fashion the application is simply an GIF file animator.

    Nevertheless if 'lofty' is what you want then look to Blender a open source (free) animation creator and here is the download page. In the words of the software developer "
    Blender is the free open source 3D content creation suite, available under the GNU General Public License" I believe this application is simply the most feature rich animation creator which can be had for free!


    GIF images use for the Animation


    Original Box Art © ID Software


    Monday, October 01, 2012

    My Home Town

    Halifax, West Yorkshire, England (Google Maps)
    Looking northwards from the summit of Beacon Hill

      
    If looking toward the horizon (near the left side of the photo) we can just see Wainhouse Tower rising above the landscape which was one of the places I use to explore as a kid. According to WiKi the Tower was owned by John Edward Wainhouse (1817-1883) and was in fact destined to be a chimney for his Dye Works lower in the valley. However in 1874 John Wainhouse sold the mill to his works manager who refused to pay the cost of building the chimney so Wainhouse kept the tower for himself and used it as an observatory. In my day the tower was neglected and open to anyone who happened by and was a great place for kid like myself with an explorers mind to play. Today Wainhouse Tower after being restored (wasn't safe) to it's former glory is only open to the public few times a year, during Bank Holidays.


    Halifax, West Yorkshire, England
    Author: Mr Barndoor
    This work is licensed under the Creative Commons Attribution 3.0 License

       
    Wainhouse Tower (WiKi)
    Author: Ian M
    This work is licensed under the Creative Commons Attribution 3.0 License


    We love 'Fair USE' - w00d